How to run image detection in ARKit and animate changes of the virtual content heading and position based on it
In this tutorial, I will show you how to use image recognition in ARKit, place virtual content on top of a recognized image and work with scale. Also, you will learn how to animate changes of the heading and position based on the image’s transform smoothly.
.gif)
Apple’s ARKit 1.5 release brought a lot of exciting features to the iOS augmented reality ecosystem. While vertical planes detection, higher resolution, and autofocus all seem like deepening already existing functionality, image recognition API provides us with a tool to use a detected real-world image as an anchor for a virtual content or a trigger for some actions.
In many cases, AR content should be aligned with the real-world image or object in order to look natural and fine looking to the user. One of the best practice is placing virtual content on top of the static images.
Static images are preferable not only because you can prepare the user’s environment by adding more light, removing obstacles, etc. but also because they don’t move. AR poster can be perhaps the most common use case. In fact, Apple used poster as an example in their Recognizing Images in an AR doc.

However, sometimes it is required that real-world anchor’s position is dynamic, so virtual content needs to follow the position changes.
Imagine a tabletop game where virtual characters are glued to the cards with their images.

Because a user can move the recognized image, AR avatar should follow real-world object’s position changes. Implementing such functionality can be tricky and is not provided by ARKit out of the box.
You can use image tracking that was added in ARKit 2.0, but in this case, you will lose the possibility to track planes. So how can we add the support for dynamic image tracking and with plane detection?
Let’s build an app that can handle it.
Requirements
We will build an image recognition application, which means that we need a device with iOS version 11.3 or higher. Other requirements are basic for any ARKit app.
To start, you will need the following:
- ARKit compatible device
- iOS 11.3+
- xCode 9.3+
Once you have those, you are ready to go.
Project setup
Download the starter project. It is based on the xCode’s Augmented Reality App template. The project contains pdf of the anchor image that we are going to detect on the scene and the Ukrainian AN-225 “Mriya” plane model that we are going to place on top of the detected image.
I had also added plane’s image to a special container inside of Asset.xcasset folder — AR Resource Group.
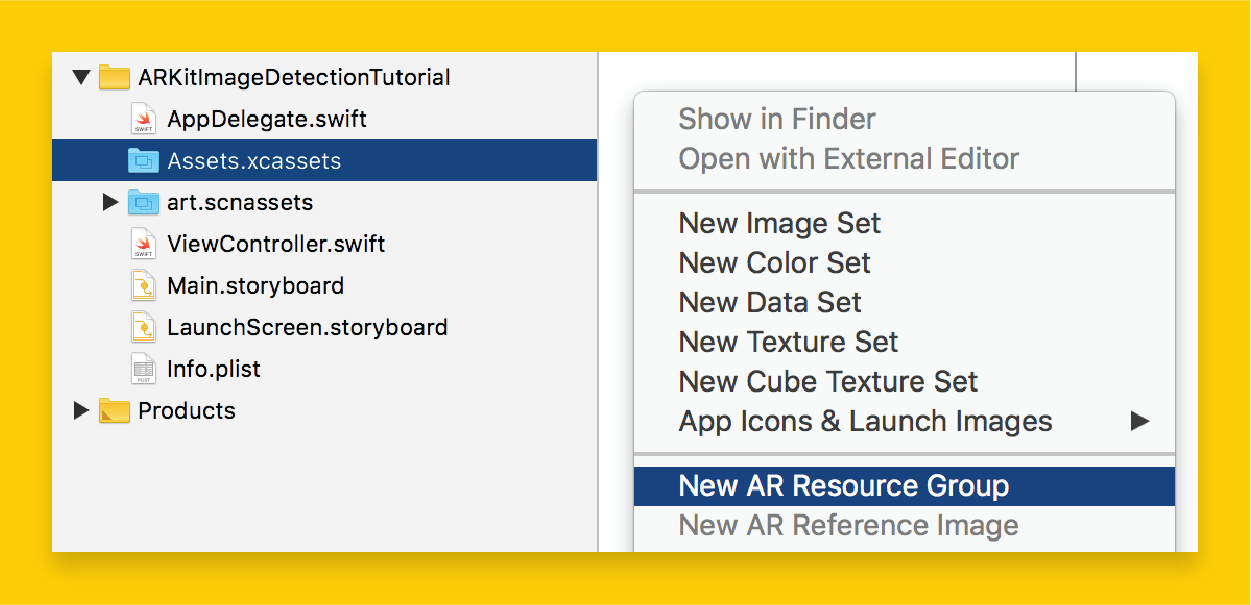
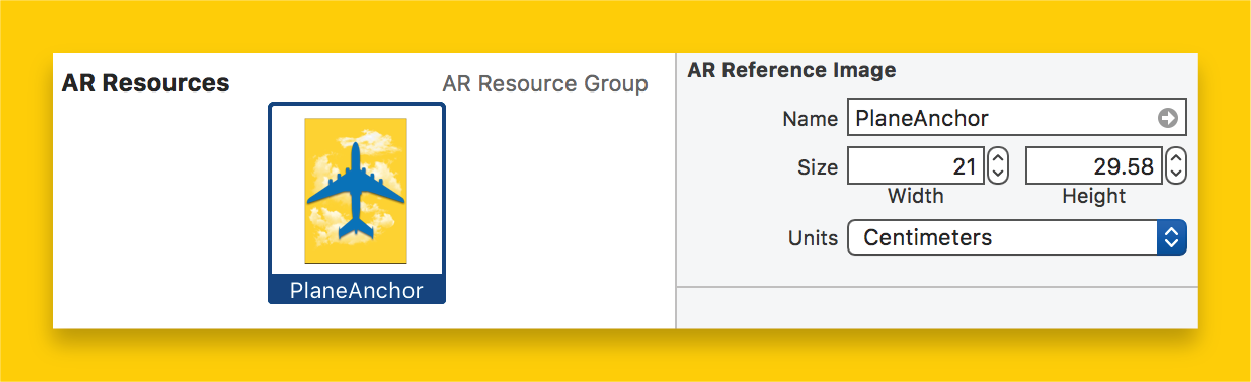
Each AR asset image needs to have the physical size set as accurately as possible because ARKit relies on this information to determine how far the image is from the camera.
Finally, when we have it all set up, we can start the coding.

Coding time
In code, we will need to achieve the following goals:
- Enable image recognition of the image that we added.
- Place a model on top of the recognized image.
- Animate the model movement to match image change of coordinates.
Image recognition
To get image recognition working, we need to load and add AR reference images as detection images to [.c]ARSessionConfiguration[.c].
Modify [.c]viewWillAppear()[.c] function as following:
Apple handles image recognition from this moment, so we don’t need to worry about it. Now the system will try to find images loaded from the AR Resources folder. After it finds any, it will add or update a corresponding [.c]ARImageAnchor[.c] that represents the detected image’s position and orientation. Pretty useful, huh?
The next step is to place an object on top of the freshly found anchor.
Model placement and transformation
After the image is found and the anchor is added to the scene, we can load and place the model on top of it. Model placement logic can be implemented in [.c]renderer(_ renderer: SCNSceneRenderer, didAdd node: SCNNode, for anchor: ARAnchor)[.c] function which gets called whenever [.c]ARAnchor[.c] is found for the first time.
Let’s break down what will be done down in the next code snippet:
- Load the model from the resource file.
- Calculate the model’s physical size.
- Calculate the difference between model and image sizes
- Transform the model to match the heading and scale of the real world image.
- Place the model on the scene with appearance animation.
We will use imageAnchor.transform to get the image’s coordinates and heading.
To make the virtual object appear the same size as the detected image, we will need the ratio of the difference between the real image’s and the model’s sizes. Difference ratio is then used in the node’s transform to properly scale the virtual object. For its calculation, we will get the image’s physical size from the [.c]imageAnchor.referenceImage[.c] and the model’s size from the [.c]boundingBox[.c] property.
Now run the app and test the code that has been added so far.
Great!🎉 However, you might notice that the position of the model is not getting updated when the image is moved around. Right now it hovers over the point where the image was first detected.
Animating position
The easiest way to make a plane follow the detected image position is by adding a plane node as a child to an image node. However, because the image node’s transform is not updated smoothly, it will result in on-screen teleportation whenever the image changes its position or orientation.
To animate the motion, we need to have a path for an object to follow.
The ARKit provides only freshly detected image’s position. Therefore, if we want an object to move and not to teleport, we have to calculate the path between the current position of an object and the current position of an image anchor.
To solve this problem, we can use linear interpolation. It will allow us to acquire missing coordinates just by having the object’s start position, final object position, and average moving speed.
Because the animation is done on a per-frame basis and we only got initial/final values, we will also need to calculate what portion of path object had passed already. To do it, let’s store animation start time and animation duration. Later we can use these values (duration and start time) together with a frame timestamp to understand what animation part we are at and properly interpolate through the start and finish matrices values.
Let’s create a struct that will hold all the needed data. We will also need an instance of it to work with, so create an animationInfo property in the ViewController.swift.
Because we are working with vector(position) and quaternion(rotation) data types, math operations with them can take some extra time.
Here is where simd comes to rescue. This module of the Accelerate framework allows computations on small vectors and matrices to be done efficiently, and thus to increase execution speed dramatically. SCNNode has its position and rotation properties represented in a data format comparable with simd — those are [.c]simdPosition[.c] and [.c]simdOrientation[.c]; simd also provides functions for interpolation that we will be using later.
Now when the data container is prepared, we can implement the animation.
For movement animation, we will use the interpolation between the initial and the final states to recalculate and set new transformation for the model each frame. Initial and final states are stored in [.c]animationInfo[.c] property that we just added.
In short, we will need to do the following:
- Unwrap the [.c]animationInfo[.c], create new if it’s nil
- Track if image current position or orientation changed, [.c]update animationInfo[.c] if needed
- Calculate what portion of time passed since animation was started
- Transform the model based on the initial/final values and passed time
All the animation logic will be placed in [.c]renderer(_ renderer: SCNSceneRenderer, updateAtTime time: TimeInterval)[.c] func. This function is a part of [.c]sceneViewdelegate[.c] and gets called each time [.c]sceneView[.c] updates the frame.
What should be done is clear, let’s implement it in code.
To achieve smoother movement, apply the curve function to the interpolation parameter:
t = sin(t * .pi * 0.5)
This results in ease out animation curve. Check “Beyond Lerp” part of this article for more hints about timing functions for lerp animations.
That’s it, we had just built an image recognition app in no time!

Epilogue
In this tutorial, we built an image recognition app that can position, scale, and move content correctly together with real world image. We made computations more efficient by using simd API with [.c]SCNNode[.c].
This has a lot of real-world applications, from various posters and tabletop games to AR-enabled fashion app that would place fancy 3D animations on top of a brand logo.
I hope you had fun building the app, if you have any questions or suggestions, please write it in the comments below.
You can download the final project from the GitHub.